Step-by-step tutorial
How to Do the Bicep Heart Pose
A bicep heart is a small heart made beside a flexed arm. One arm supplies one curved edge; your opposite hand curves inward to complete the other. It is about the angle of your arms, not the size of your muscles.
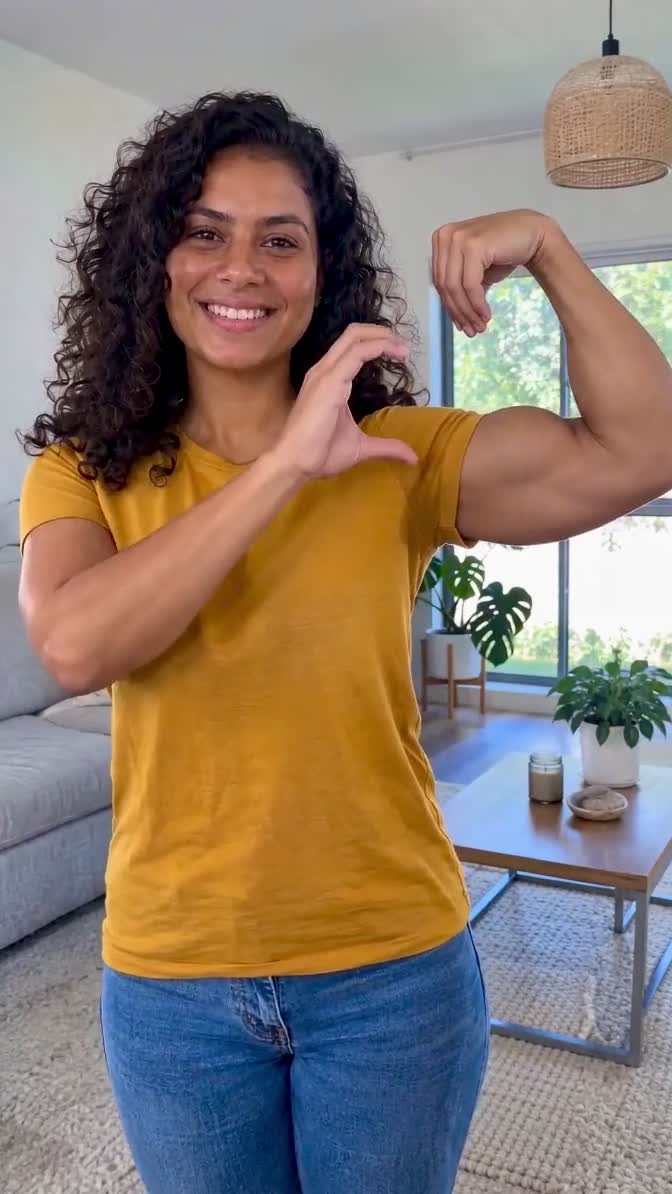
Three steps
Master the Bicep Heart in Three Moves
The shape appears when flex, connection and framing work together.
- 01FLEX
Leave room for the curve
Face the camera directly and raise one arm into a comfortable flex. Keep your fist near head height — not lower — so the curve of the bicep has enough room to form the top of the heart. Relax your shoulder: a hunched shoulder compresses the gap you need. Frame the shot wide enough to include the full elbow on the outside edge, because cutting the elbow clips one half of the heart.
- 02CONNECT
Complete the other half
Bring your free hand toward the inside of the raised arm. Curve your fingers and thumb so they mirror the shape of the bicep on the other side. The heart lives in the negative space between your hand and your upper arm — keep checking that gap in a live preview and make small adjustments until the outline reads cleanly as a heart. Straight fingers break the curve, so keep them gently curled throughout.
- 03HOLD
Let the moment land
Hold the pose briefly and let your expression give it personality — a soft smile or a playful look turns a shape into a moment. Keep your eyes toward the camera rather than looking at your own hands. If the heart shape disappears on camera, resist the urge to twist your wrist into an uncomfortable position: instead, turn slightly toward the light source, which will improve contrast and help the outline show up. Shoot a few takes and check each from the viewer's perspective.
Camera position matters
Three Angles, Three Different Results
The same pose reads very differently depending on where the camera is relative to your body. Understanding angles is the difference between a clear heart and a shape that disappears.
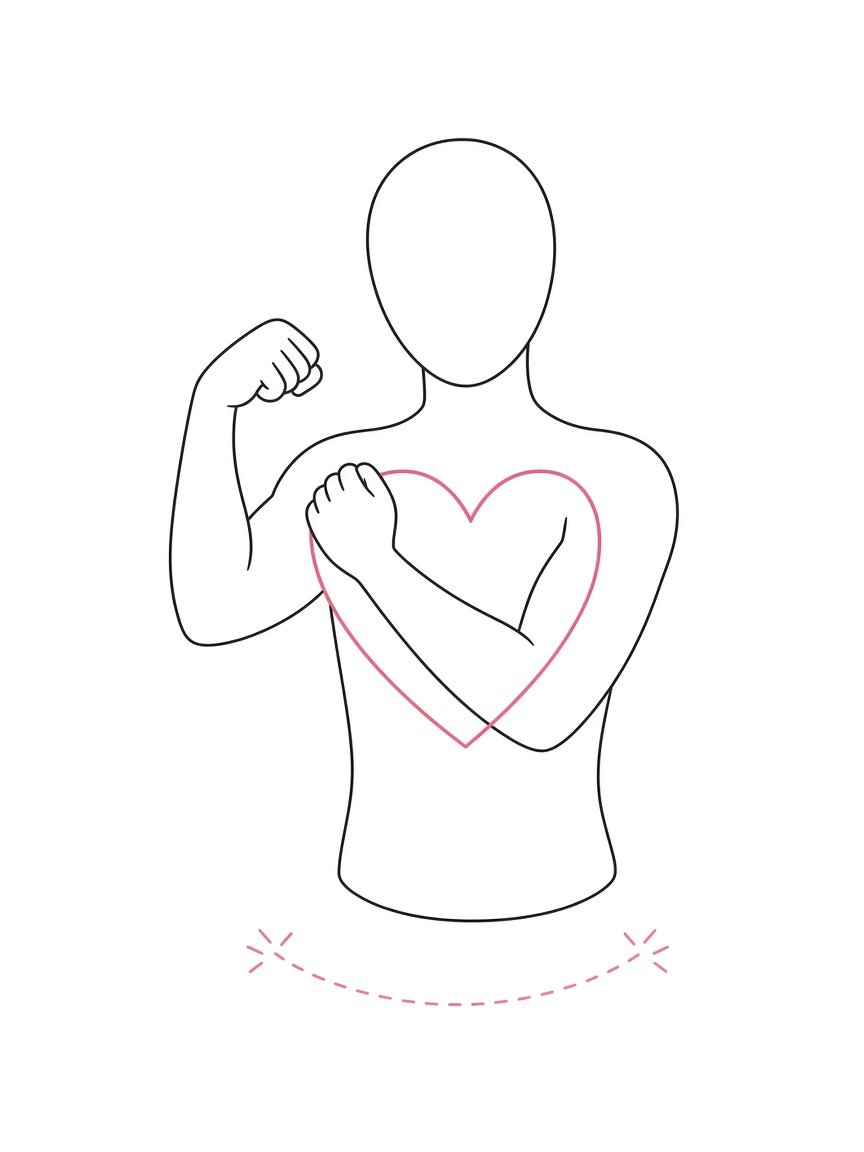
Straight-on (0°)
The camera directly faces your chest. This is the strongest position for the bicep heart because both arms are parallel to the sensor. The heart outline is at its widest and most symmetrical. Keep both forearms in the same plane — if one is closer to the camera than the other, the shape starts to collapse. Use a tripod or place your phone on a surface at chest height for the clearest result.
✓ Best angle for a clear heart
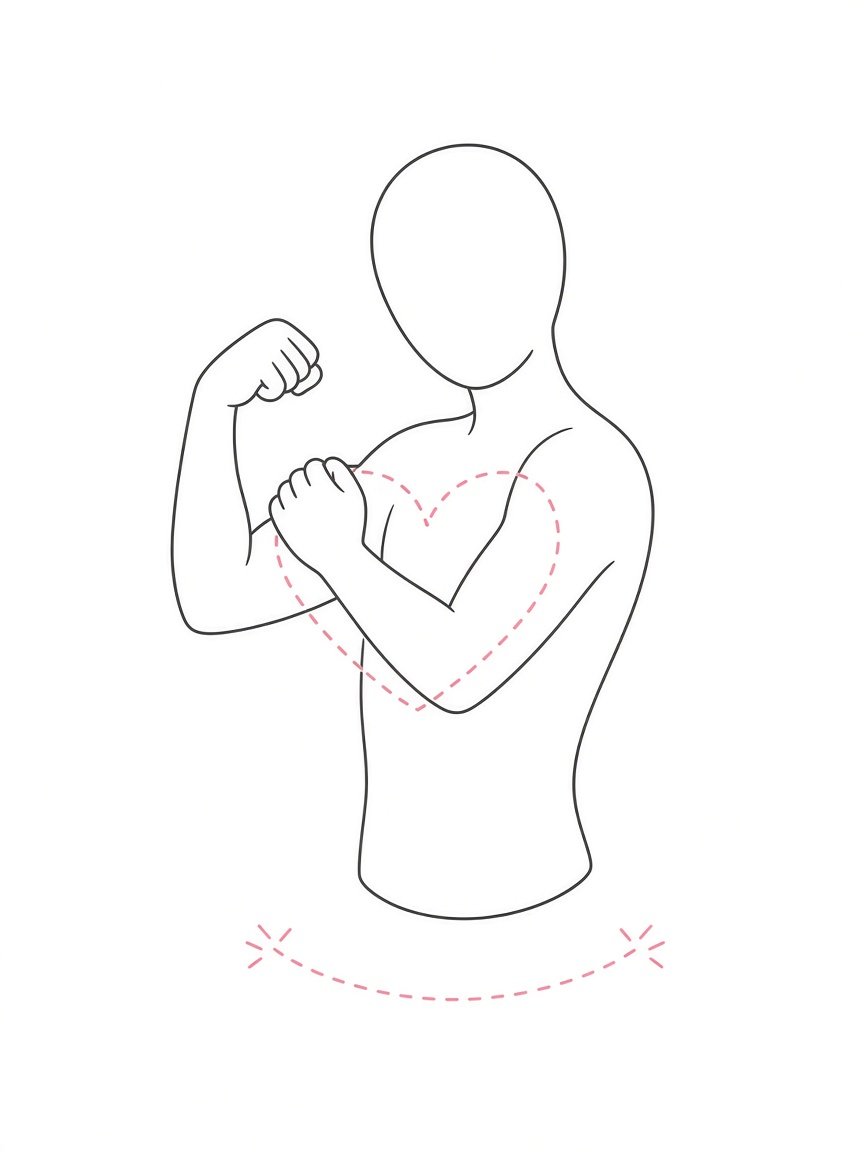
30° side angle
A slight turn to one side adds depth but introduces a foreshortening risk. The arm nearest the camera appears shorter than the arm farthest away, so the heart can look lopsided or the gap between hand and bicep can close entirely. If you use a side angle, compensate by raising the elbow of the near arm slightly higher, which opens the gap back up.
⚠ Heart is most likely to disappear here — check your preview
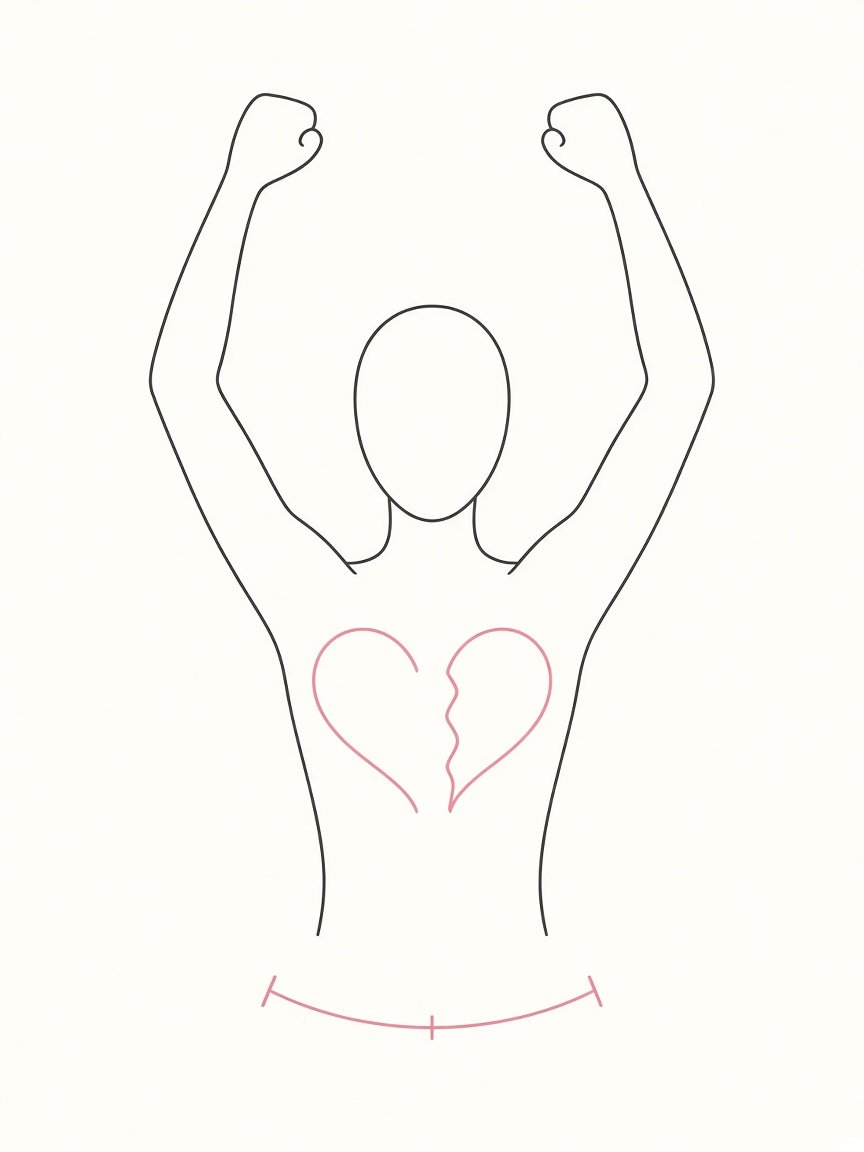
Arm raised overhead
Raising the flexed arm above head height changes the silhouette entirely. The bicep curves away from the camera rather than toward it, so the outline that creates the heart becomes invisible. This angle works for a dramatic flex shot but is not effective for the bicep heart shape. Keep the elbow at or just above shoulder height for best results.
✗ Heart outline is not visible at this angle
The example image at the top of this page shows the straight-on angle where the heart shape reads most clearly against an even background.
What goes wrong
Four Common Mistakes and How to Fix Them
Most problems with the bicep heart pose come down to framing and light, not technique. These are the four issues that appear most often.
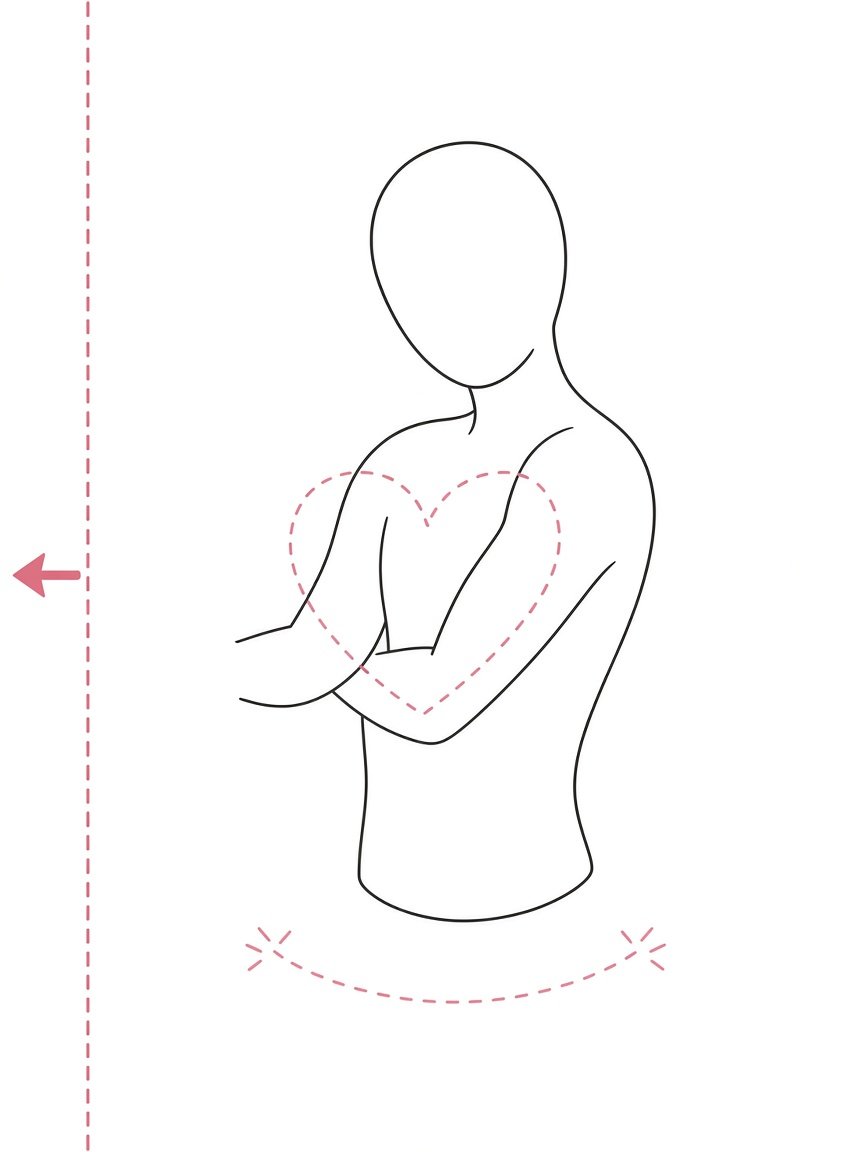
Arm out of frame
The problem: The elbow or the outer edge of the raised arm is clipped by the frame, cutting one side of the heart and leaving the outline incomplete.
The fix: Step back from the camera or zoom out until there is at least a hand-width of space outside your elbow. For a selfie, hold the phone further away or use a timer with the phone on a surface.
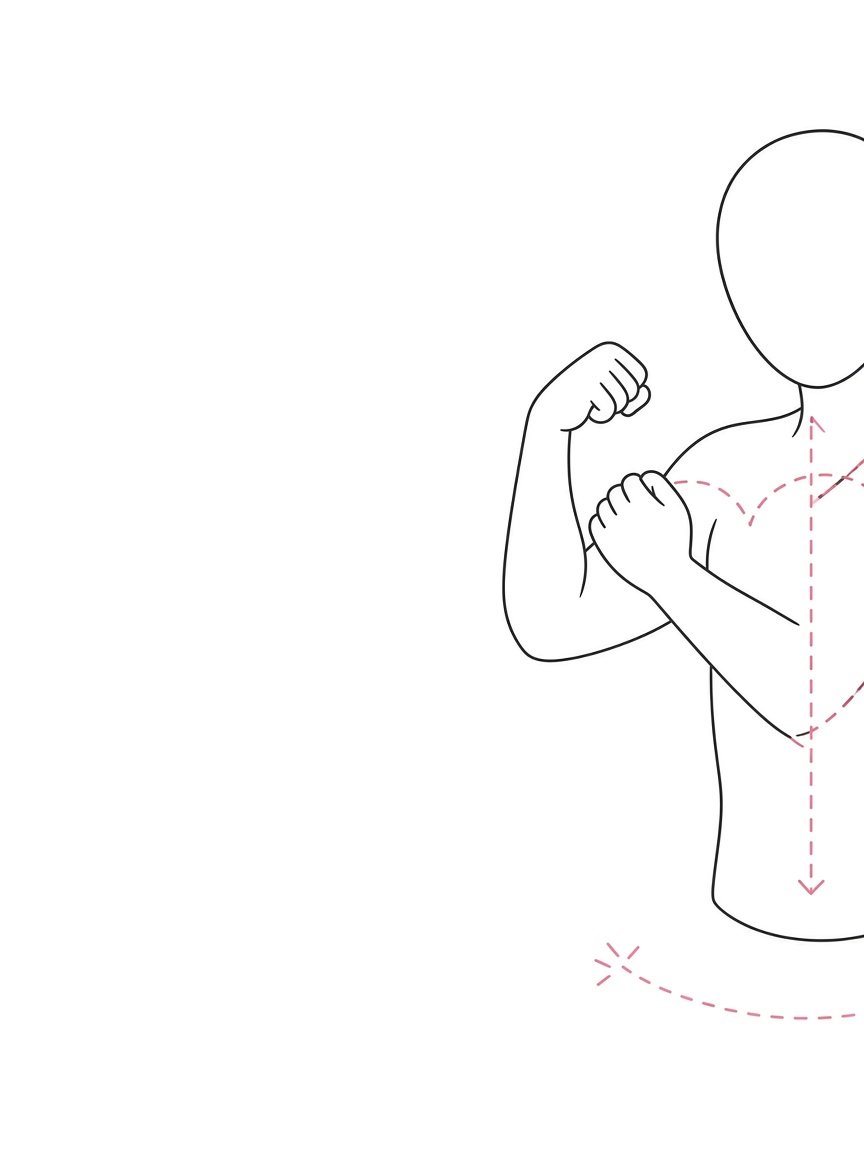
Elbow cut off at the bottom
The problem: The camera is too high, cropping the bottom of the heart where the two arms come together and close the outline.
The fix: Lower the camera to chest height or slightly below. For a tripod shot, tilt the camera slightly upward so the full forearm stays in view without distorting the face.
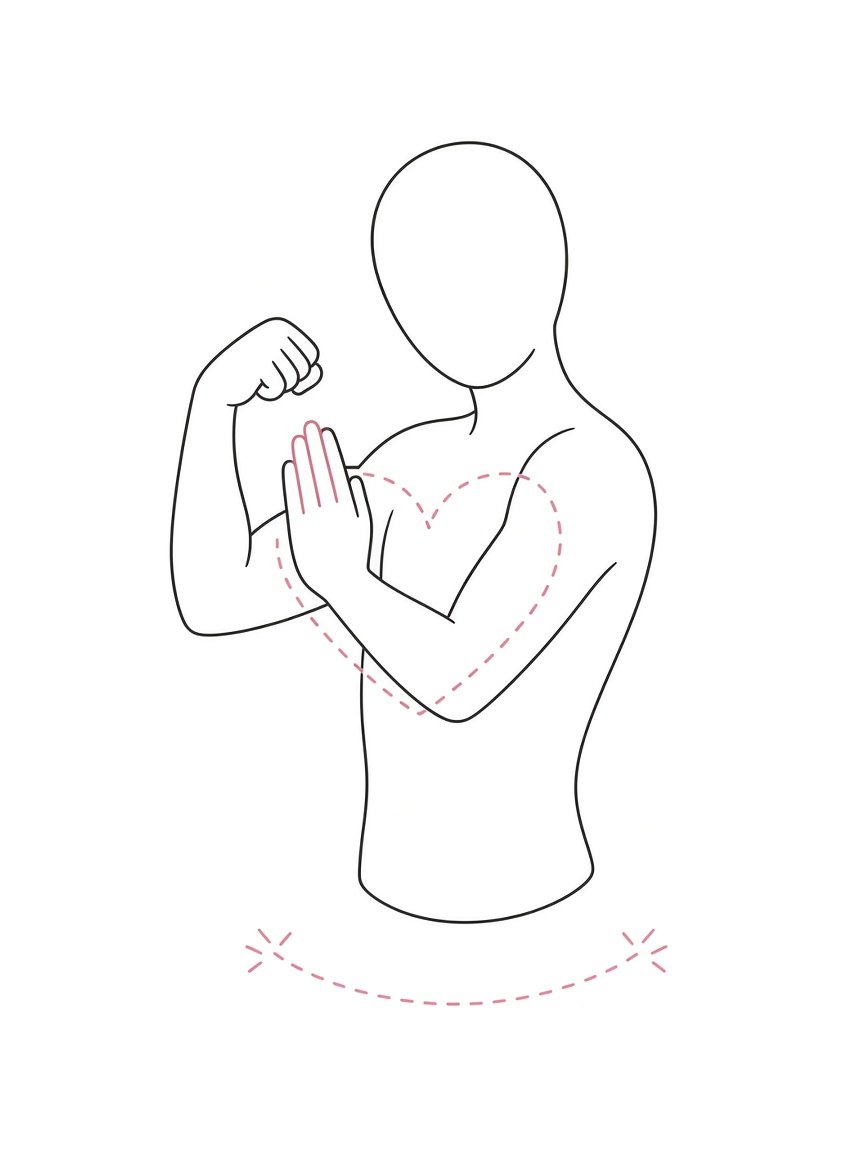
Straight fingers
The problem: The opposite hand is flat or the fingers point outward rather than curving toward the bicep. The gap between hand and arm forms a straight line instead of a curve, so it reads as a bracket or V-shape rather than a heart.
The fix: Curl the fingers gently and bring the thumb inward too. Think of cupping a small ball — both sides of the heart need a curve.
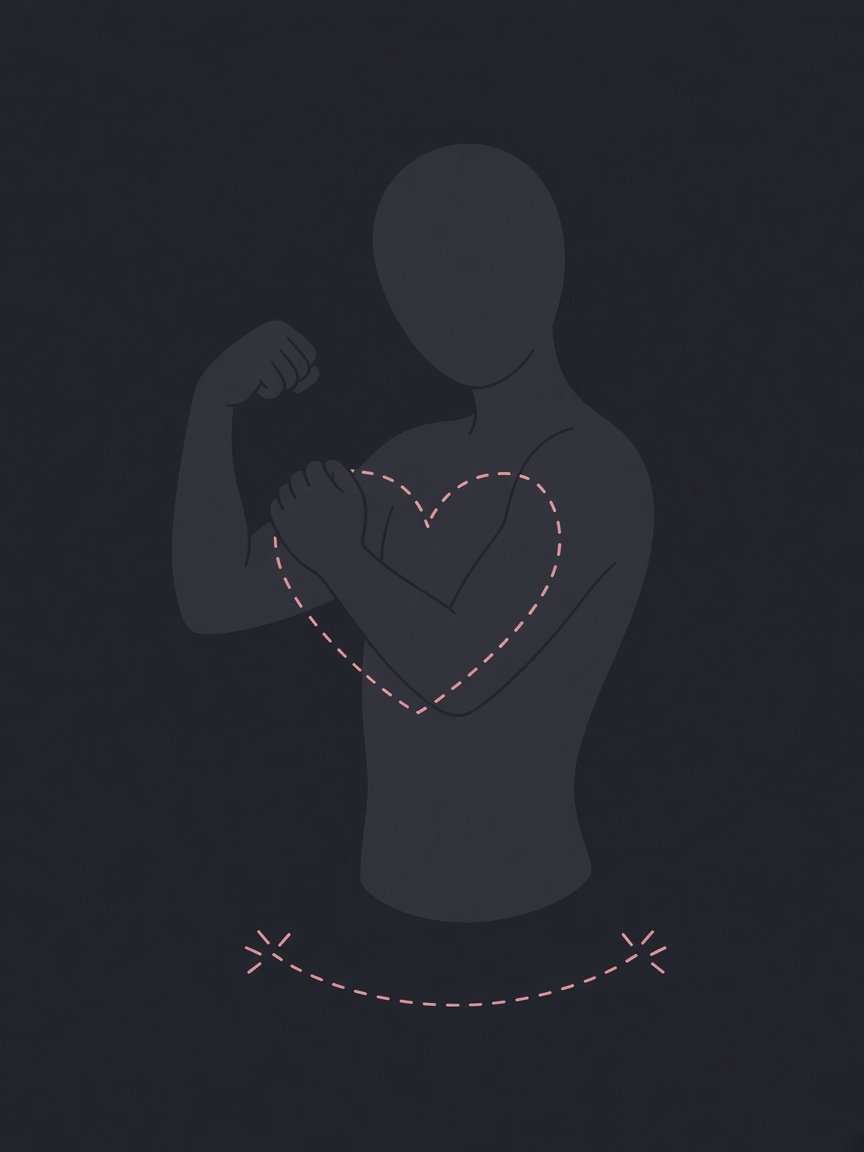
Poor lighting
The problem: When the light is behind you or to the side, your arm and your hand cast shadows on each other. The gap closes visually and the heart shape disappears.
The fix: Face a window or a soft light source directly. Front-facing light separates the hand from the arm with contrast, making the heart outline easy to read. Avoid overhead light, which casts arm shadows downward across the chest.
Real vs. AI-generated
Filmed vs. AI-Generated Bicep Heart Videos
The same gesture, two different starting points. Each has its strengths.
Filming the pose yourself
When you film a real performance, you control every detail: the expression, the pacing, the exact moment the shape forms. You can try several takes from slightly different angles and choose the best outcome. The movement is entirely yours and the result is a genuine performance rather than an interpretation.
The challenge is execution. Getting the angle, framing and lighting right at the same time takes a few attempts. The common mistakes above — arm out of frame, low contrast, straight fingers — are easiest to avoid when you review the shot immediately after each take.
Starting from a photo
An AI video generator takes a still photograph as a visual reference and builds the movement around it. The appeal is that you begin with a picture — a portrait you already have, or one a friend took — rather than recording a fresh performance. The tool animates the arm gesture and creates a short clip from that single starting frame.
The trade-off is variation: AI-generated hands, facial expressions, clothing and backgrounds can change between frames. The result is an interpretation of the pose rather than a recording of it. Watch the entire output before sharing.
Three examples of the AI-generated bicep heart effect — one person, two people and one pet — each animated from a single supplied photo:
These are supplied examples. AI-generated movement varies; watch the full clip before sharing.
Turn your photo into a bicep heart video
Try the AI generator
Upload one portrait, choose your subject type and generate the arm-heart animation. No account needed to explore the examples.
Or preview with an example photo first. For photo inspiration and framing setups, explore our bicep heart pic gallery, or trace how the gesture spread in our TikTok bicep heart trend guide.
Common questions
Frequently Asked Questions
What is a bicep heart pose?
A bicep heart pose is a hand-and-arm gesture that forms a small heart beside a flexed upper arm. You raise one arm into a comfortable flex, then curve your opposite hand so the gap between your hand and your bicep reads as a heart shape. The outline — not the size of your arm — creates the effect.
Is a bicep heart the same as a finger heart?
No. A finger heart is a small heart made by crossing the thumb and index finger close to the camera, usually from one hand. A bicep heart involves the whole forearm: one arm flexes to form one curved side of the heart, and the other hand curves inward to complete the shape beside it. The bicep heart is larger, requires both arms and is typically shown from a wider frame.
Do I need big arms to do the bicep heart?
No. The shape depends on the angle of the arm and the position of the opposite hand, not the size of the bicep. Keep your shoulder relaxed, bend the arm into a comfortable position and use a camera preview to fine-tune the gap. Never force your wrist or shoulder into a position that feels strained.
How do I get the heart shape to show up in a photo?
Four things help the most: face the camera squarely so the gesture reads flat rather than foreshortened, keep your elbow inside the frame so neither side of the heart is cut off, make sure your front is well-lit so the hand and arm contrast clearly, and check a live preview before shooting. Small adjustments to the angle of your raised arm or the curl of the opposite hand can sharpen the outline quickly.
Where the Trend Started: TikTok Bicep Heart Timeline →